Tips on composition
TIPS ON COMPOSITION
Following our weekly lessons here at PPSOP (www.ppsop.com), a weekly assignment is given to every student. This past week, after reviewing the work turned in from Assignment Six in our Understanding Exposure class, I was reminded again of just how much beginning and intermediate photographers need to be ever mindful of two compositional principles as they work towards the goal of creating the Perfect Picture.Principal one:
Keep a watchful eye on the background!
Keep a watchful eye on the background!
Anyone who knows me, will attest to my unwillingness to head out the door to shoot wildlife. I can be patient, but NOT when it comes to waiting on wildlife to “do their thing”. And even if they “do their thing” e.g. the Bald Eagle swopping down across the bay to grab a salmon, there is no guarantee that at that moment I am lucky enough to have the right lens, the right light and/or the right point of view. Animals are more unpredictable than a roomful of two year-olds.
However, when I heard about a “rain forest” like setting in a 4-acre netted enclosure (complete with more than 40 different tropical bird species and bird feeding stations) I reconsidered my position on this matter and sure enough, like many other shooters, I was soon ‘feasting’ on tropical birds in a natural setting at the Jurong Bird Park in Singapore.
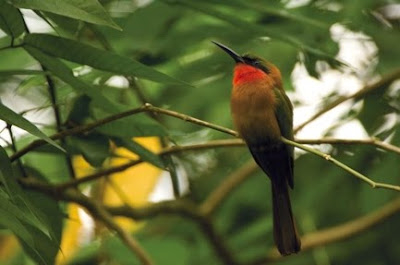
 In this first image, do you see that the background is filled with ‘contrast shifts’? Note the large white globs of light to the right and left of the bird and the yellow glob of tone to the left of the bird. These two contrast shifts cause the eye to jerk away from the real hero of the shot, the bird.
 Have you ever been in a movie theater and during the show, someone heads out the exit door into the afternoon bright light? That sudden shift in contrast, dark to bright light, gets your attention really quick! And so do the two contrast shifts we see here.
The solution in this case was not only a simple one, but it leads into the second tip towards better compositions: turning the camera vertically! As you can see in this next photo, I turned the camera vertically and moved a few inches to the right and this simple solution cleaned up the white and yellow contrast shifts. Now the eye is free to relax and enjoy the ‘movie’! (Nikon D300 with Nikkor 200-400mm lens at f/5.6 at a 1/640 second ISO 200)


Not all of the time—but most of the time—you can compose each and every subject in either the horizontal or vertical format. It may take some moving around, shifting your point of view, moving closer or backing up, or even changing a lens. But, the benefits of shooting your subject in both formats are obvious.
Benefit number one is that when you crop that horizontal into a vertical IN camera, you won’t see a loss in image quality since you still have the same amount of pixels! Cropping a vertical out of a horizontal via your computer will ALWAYS mean a loss in image quality since you have just “thrown away” about half of your pixels and without the needed pixels that vertical image will make it as a high-quality enlargement.
When you get in the habit of shooting the vertical, in camera, right after you shoot the horizontal, you’ll of course be spending less time on the computer, allowing you more time to shoot!. Additionally, should the day ever come when you wish to sell you work, you’ll be more than ready: Should a client express interest in one of your horizontals and then ask if it is available in the vertical format, you can meet the demand and, thirty days later, deposit that check for your first magazine cover!
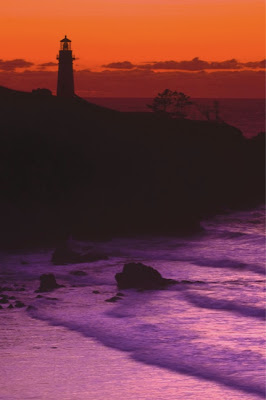
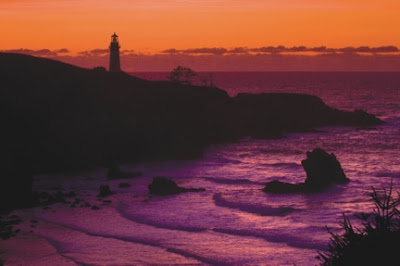
Yaquina Head Lighthouse is one of the most photographed lighthouses along Oregon’s Coast, but when looking at the many images that hang in the Coastal Art Galleries and on postcard racks, rare is the sighting of a vertical of this proud and dignified beacon of light. And such is the emotional message of the vertical frame; it is proud, dignified, active and no doubt “going places” in contrast to the horizontal frame whose message is calm, tranquil and restful.
With my 70-200mm Nikkor lens mounted on tripod, combined with my Lee 3-stop GND filter and my FLW magenta filter, I first shot the horizontal and than quickly followed up with the vertical. (Both exposures were shot at F/11 at a ¼ second with 200 ISO)
All my best-
Bryan F Peterson
bryanfpeterson@mac.com
Founder/PPSOP


